At a basic level, a computer can only do three things:
STORE information in memory
In Q8, the main memory area is that gray grid.
MOVE information around in memory
(Copying the number from one box into another box) This is done with CPU instructions,
commonly referred to as operations (ops), which we'll get to in a moment.
WORK with information
This can't happen in the main memory area,
it has to happen in a working memory area called a register (the two special boxes at the bottom of
the main memory grid).
To do work on information, you have to move it into the registers, do the work there, and then
store the results of that work back into main memory, so that you can free up the registers to do
more work.
Common Quine8 Structures
Q8 is designed a little differently than the standard x86 or ARM processors commonly
seen today. It only has 2 registers, and doesn't provide a general purpose stack. This
greatly simplifies the instruction table, but requires the programmer to change their
method of interaction with the system slightly.
To keep things clear as we talk about the memory grid, we'll use the words tile or cell
to refer to specific byte-wide boxes in memory.
To efficiently write code for Q8 without diving into runtime modification of
bytecode, the programmer must use general memory as external registers. The platform provides a few
of instructions that help to make that interaction as painless as possible.
Q8 Assembly Primer
To improve legibility, I've provided a little asssembly block next to each grid image
Q8's assembly is simple, but it's still best to describe the notation ahead of time.
Instruction Layout
Instructions LOAD A 9
Instructions are positioned op and then argument. An instruction like SET A 9
can be read as "set register A to the value 9"
Labels and Data
Labels exit:
To tell the assembler that you want to use a name to refer to a spot in assembly, all you need to
do is plop your name where you want it, and then append a : to the end, like loop:
Data Definition y: $55
To define some data that'll live in the grid, you can use a label, and then prefix the value you want to
use with a $. For example, to define a variable, x, and to set it to 1 initially, you'd
write this: x: $1
Position Shifters
Shifters > 25
To place the next piece of code at a particular position, position shifters can be used. These are mostly useful
for asthetic reasons, allowing the user to neatly separate op blocks from data. Another possible use, putting a
catchall halt at the end of the grid so that the program counter doesn't wrap around from 255 to 0 on an unforseen
failure state
Code Comments
Comments ; Hello
Comments are quite useful for program legibility. Assembly can be hard to follow, comments are there to help
ADD A x ; Adds the value at labelled position x to A
Assembly Example
This program sets A to 1, B to the value at label x, 1, and then adds them. The result, 2, is left in A.
SET A 1
LOAD B x
ADD A B
> 32
x: $1
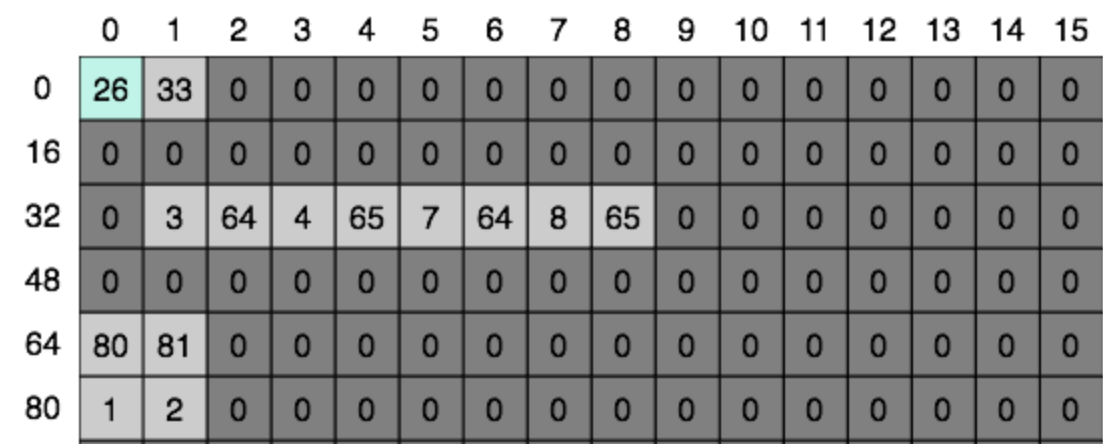
I/O
The Direct
A great little debugging buddy, the SET instruction.
SET is excellent for debugging and cramming single-use constants into registers.
This mechanism proves remarkably useful in some of the example programs for tracking boolean
data, and drawing specific block values to the screen.
Assembly
JMP 33
> 33
SET A 9
SET B 2
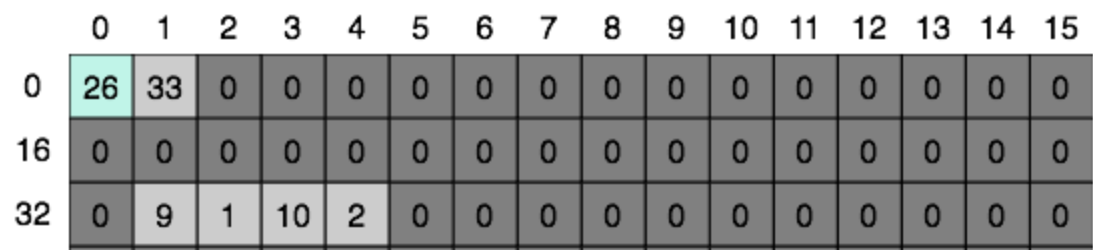
The Indirect
The indirect accessors, LOAD and STORE are the meat and potatoes of the Q8 I/O family.
Most of the time to keep the limited register space available for ops, you'll wind up using these.
Assembly
JMP 26
> 33
LOAD A x
LOAD B y
STORE A x
STORE B y
> 64
x: $1
y: $2
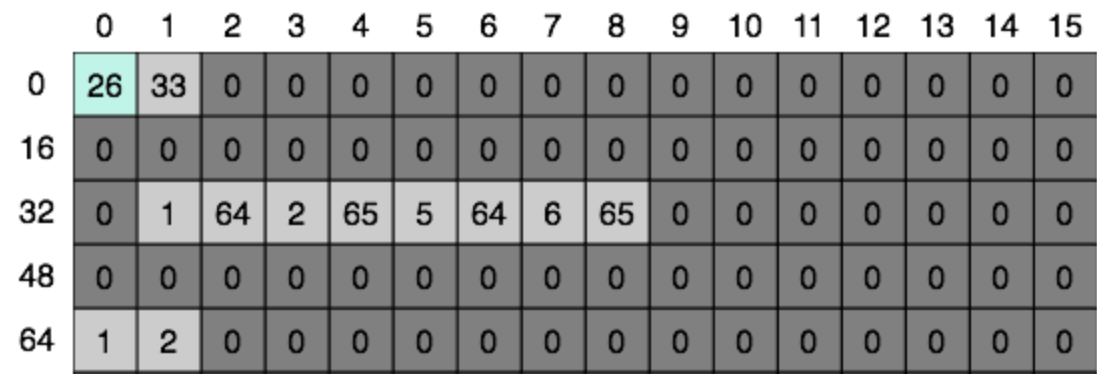
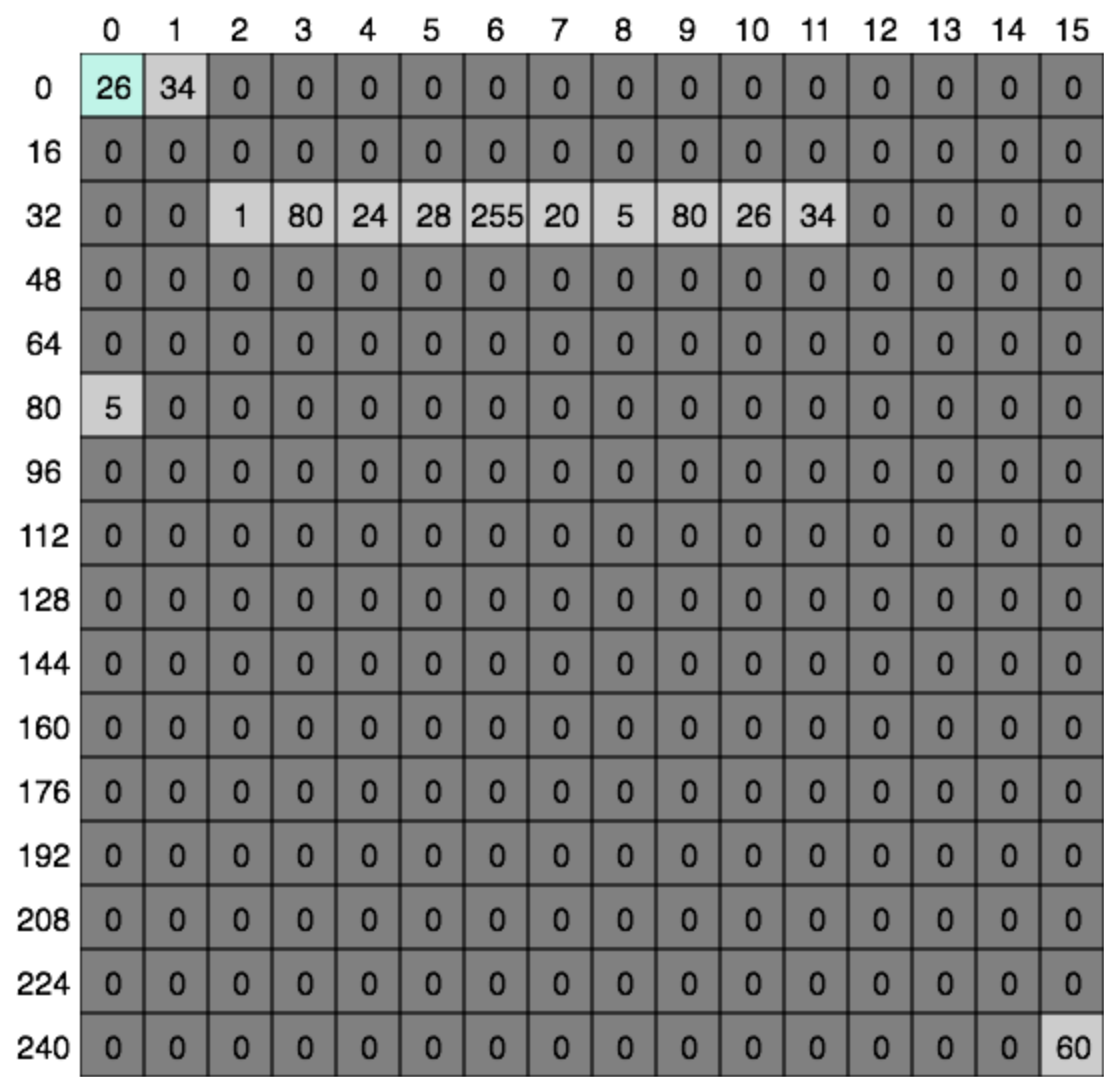
The Double Indirect
Double indirect accessors are used a little less frequently, but when you need them, you need them. They've proved Very useful
for tracking indices into an array, or setting up jump tables. You can LOADI to get the value,
and LOAD to get the index. When you want to change your index, you LOAD the index,
make your modification, and then STORE it back again. Changing the value at the tile pointed to by the index
is a STOREI
Assembly
JMP 26
> 33
LOADI A x_loc
LOADI B y_loc
STOREI A x_loc
STOREI B y_loc
> 64
x_loc: $80
y_loc: $81
> 80
x: $1
y: $2
Loops
The Register Loop
This doesn't prove to be very useful in practice, as most of the time you'll
need to keep both registers available, but it does take fewer cpu cycles than a tile loop,
not needing the additional blocks to load and store the external tile. It's also good for
reducing the loop's tile footprint, as it doesn't need to use an extra tile for state.
Assembly
SET A 5
JMP loop_start
> 34
loop_start:
ISZERO A
JZ 255
DEC A
JMP loop_start
> 255
HALT
The Memory Tile Loop
This is the loop you'll see frequently in the example projects. It's
a little longer than a register loop, but far more practical, as it keeps the two registers
available for the code the loop jumps into. It isn't perfect. The loop overwrites a register,
so you'll need to save it if you want to come back to that value.
Assembly
JMP loop_start
> 34
loop_start:
LOAD A idx
ISZERO A
JZ 255
DEC A
STORE A idx
JMP loop_start
> 255
HALT
> 80
idx: $5